Heatmaps in plotly with imshow
A heatmap is a visualization tool that represents the relation between variables with colored tiles. Generally, heatmaps are used to represent correlation between variables (a correlation matrix).
The imshow function from plotly express can be used to create heatmaps in Python. This function admits several types of data as input, such as arrays of arrays, numpy arrays or pandas data frames.
import plotly.express as px

# Sample data
data = [[5, 23, 15, 47], [25, 5, 25, 12],
        [31, 35, 25, 41], [12, 18, 5, 7]]

fig = px.imshow(data)

fig.show()
Minimum and maximum values
Note that you can make use of the zmin and zmax arguments to define the range of the heatmap. By default, these values correspond to the minimum and maximum values of the data.
import plotly.express as px

# Sample data
data = [[5, 23, 15, 47], [25, 5, 25, 12],
        [31, 35, 25, 41], [12, 18, 5, 7]]

fig = px.imshow(data, zmin = 15, zmax = 35)

fig.show()
Origin
By default, the origin (0, 0) is at the upper left, but if you set origin = 'lower' you can place the origin at the lower left.
import plotly.express as px

# Sample data
data = [[5, 23, 15, 47], [25, 5, 25, 12],
        [31, 35, 25, 41], [12, 18, 5, 7]]

fig = px.imshow(data, origin = 'lower')

fig.show()
Labels
If your input data is a data frame, the column and row names will be used as labels. However, you can also make use of the x and y arguments to set the names for each row and column of the heatmap. Note that you can also customize the axis labels and the name of the legend.
import plotly.express as px

# Sample data
data = [[5, 23, 15, 47], [25, 5, 25, 12],
        [31, 35, 25, 41], [12, 18, 5, 7]]

fig = px.imshow(data,
                labels = dict(x = "X-axis", y = "Y-axis", color = "Legend"),
                x = ['A', 'B', 'C', 'D'],
                y = ['V1', 'V2', 'V3', 'V4'])

fig.show()
You can change the labels position with the update_(x|y)axes functions. In the following block of code we are setting the labels for the X-axis on top.
import plotly.express as px
# Sample data
data = [[5, 23, 15, 47], [25, 5, 25, 12],
[31, 35, 25, 41], [12, 18, 5, 7]]
fig = px.imshow(data,
labels = dict(x = "X-axis", y = "Y-axis", color = "Legend"),
x = ['A', 'B', 'C', 'D'],
y = ['V1', 'V2', 'V3', 'V4'])
fig.update_xaxes(side = "top")
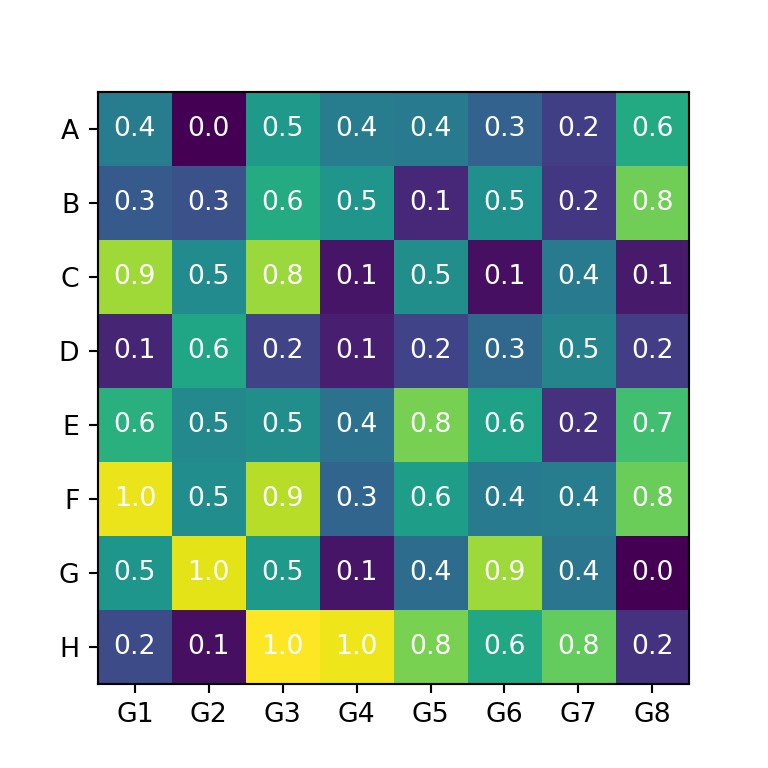
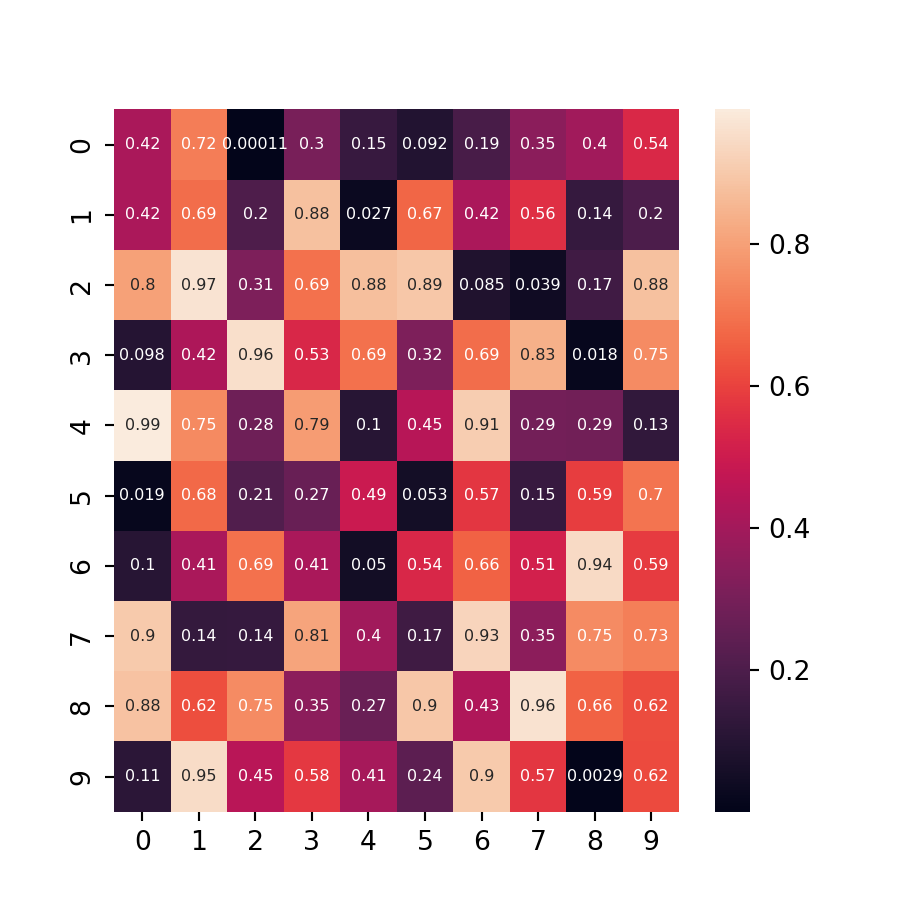
fig.show()Text for each cell
Setting text_auto as True will display the corresponding value for each cell and the color for each text will be adjusted automatically based on the cell color. Note that this argument can also take as string as input, such as '.2f' to set a specific formatting.
import plotly.express as px

# Sample data
data = [[5, 23, 15, 47], [25, 5, 25, 12],
        [31, 35, 25, 41], [12, 18, 5, 7]]

fig = px.imshow(data,
                text_auto = True,
                x = ['A', 'B', 'C', 'D'],
                y = ['V1', 'V2', 'V3', 'V4'])

fig.show()
Color customization
The default color palette of the plotly heatmaps can be overriden through the color_continuous_scale argument. Recall that you can see the full list of available palettes with px.colors.named_colorscales() after importing the plotly express module.
import plotly.express as px

# Sample data
data = [[5, 23, 15, 47], [25, 5, 25, 12],
        [31, 35, 25, 41], [12, 18, 5, 7]]

fig = px.imshow(data,
                color_continuous_scale = 'RdYlBu',
                x = ['A', 'B', 'C', 'D'],
                y = ['V1', 'V2', 'V3', 'V4'])

fig.show()
Remember that you can customize the color midpoint making use of color_continuous_midpoint. This argument takes a number as input that will be used as the new midpoint.
import plotly.express as px

# Sample data
data = [[5, 23, 15, 47], [25, 5, 25, 12],
        [31, 35, 25, 41], [12, 18, 5, 7]]

fig = px.imshow(data,
                color_continuous_scale = 'RdYlBu',
                color_continuous_midpoint = 10,
                x = ['A', 'B', 'C', 'D'],
                y = ['V1', 'V2', 'V3', 'V4'])

fig.show()
The imshow function also provides an argument named range_color that can be used to specify a color range by passing an array with two numbers as input. This argument overrides zmin, zmax and color_continuous_midpoint.
import plotly.express as px

# Sample data
data = [[5, 23, 15, 47], [25, 5, 25, 12],
        [31, 35, 25, 41], [12, 18, 5, 7]]

fig = px.imshow(data,
                color_continuous_scale = 'RdYlBu',
                range_color = [10, 30],
                x = ['A', 'B', 'C', 'D'],
                y = ['V1', 'V2', 'V3', 'V4'])

fig.show()