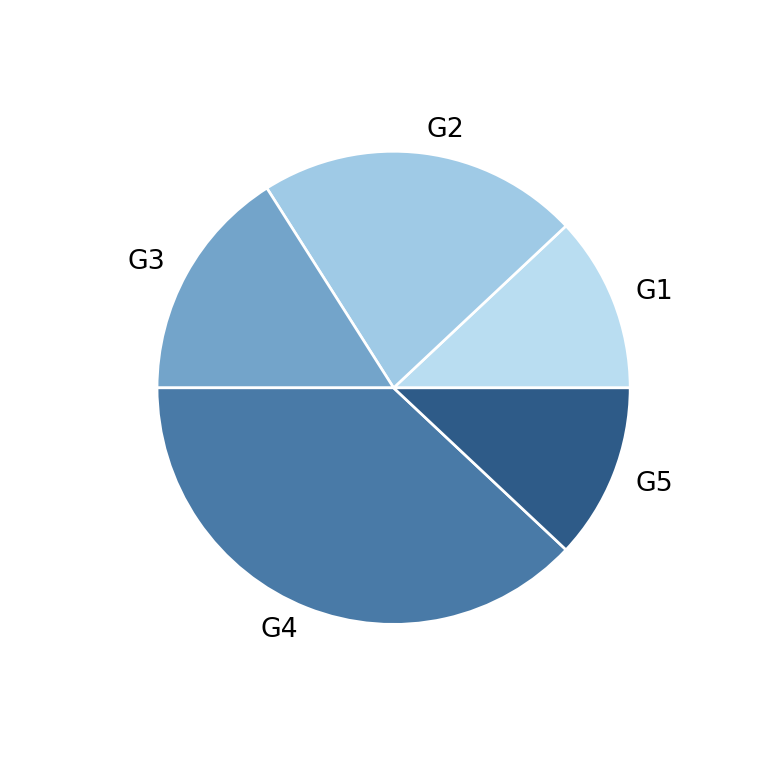
The pie function from plotly
Pie charts represents the numerical data for several groups in slices, where the area of each slide is given by the percentage of each group respect to the sum of values. This kind of chart is not recommended when there are many groups or when the values are balanced, as angles are not easy to read.
When using plotly you can use the pie function in order to create a pie chart. You will need to input the values and the labels to values and names, respectively, as an array or as the name of data frame columns.
import plotly.express as px

fig = px.pie(values = [20, 50, 37, 18],
             names = ['G1', 'G2', 'G3', 'G4'])


# Equivalent to:
# import pandas as pd
# df = pd.DataFrame({'values': [20, 50, 37, 18],
#                    'groups' = ['G1', 'G2', 'G3', 'G4']})
# fig = px.pie(df, values = 'values', names = 'groups')

fig.show()
The pie function will calculate and display the percentage corresponding for each group. In addition, the groups will be ordered decreasingly counterclockwise according to that percentages.
Adding a title to the figure
Passing a character string to the title argument it is possible to add a title to the pie chart, as in the example below.
import plotly.express as px

fig = px.pie(values = [20, 50, 37, 18],
             names = ['G1', 'G2', 'G3', 'G4'],
             title = "Pie chart title")

fig.show()
Color by group
Note that despite each slice has a different color, the pie function also provides an argument named color which allows specifying groups or subgroups.
import plotly.express as px

fig = px.pie(values = [20, 50, 37, 18],
             names = ['G1', 'G2', 'G3', 'G4'],
             color = ['A', 'A', 'B', 'B'])

fig.show()
Custom color for each slice
It is possible to override the color for each slice. For that purpose you will need to pass an array with groups to the color argument and then use the color_discrete_map argument to pass a dict specifying the color for each group. An alternative is to use the color_discrete_sequence argument.
import plotly.express as px

fig = px.pie(values = [20, 50, 37, 18],
             names = ['G1', 'G2', 'G3', 'G4'],
             color = ['G1', 'G2', 'G3', 'G4'],
             color_discrete_map = {'G1': '#30BFDD',
                                   'G2': '#8690FF',
                                   'G3': '#ACD0F4',
                                   'G4': '#F7C0BB'})

fig.show()
Color opacity
Recall that you can customize the transparency of the colors with the opacity argument, which can take values between 0 and 1.
import plotly.express as px

fig = px.pie(values = [20, 50, 37, 18],
             names = ['G1', 'G2', 'G3', 'G4'],
             opacity = 0.75)

fig.show()
Line style
By default, plotly pie charts doesn’t have borders. However, you can add and customize them with update_traces, following the example below.
import plotly.express as px

fig = px.pie(values = [20, 50, 37, 18],
             names = ['G1', 'G2', 'G3', 'G4'],
             color = ['G1', 'G2', 'G3', 'G4'])

fig.update_traces(marker = dict(line = dict(color = 'black', width = 2)))

fig.show()
Donut plot
The pie function can also be used to create doughnut charts in plotly with hole. You will need to input a value between 0.01 and 0.99 to the argument. The bigger the value, the bigger the hole.
import plotly.express as px

fig = px.pie(values = [20, 50, 37, 18],
             names = ['G1', 'G2', 'G3', 'G4'],
             color = ['G1', 'G2', 'G3', 'G4'],
             hole = 0.5)

fig.show()